Installation and configuration of the rTorrent OPKG package
rTorrent is a C++ BitTorrent client for Linux based on the libTorrent libraries. Lightweight and undemanding for system resources BitTorrent client.
We will consider the installation of a torrent client rTorrent from the Entware repository.
First you need to prepare an external USB stick and install the Entware repository package system on it. How to do this is shown in the Using the EXT4 file system on USB drives article.
Install the rtorrent-easy-install package.
Run the
opkg install rtorrent-easy-installcommand:/ #
opkg install rtorrent-easy-installInstalling rtorrent-easy-install (0.2-3a) to root... Downloading http://bin.entware.net/mipselsf-k3.4/rtorrent-easy-install_0.2-3a_mipsel-3.4.ipk Installing rutorrent-plugin-rpc (3.8-1) to root... Downloading http://bin.entware.net/mipselsf-k3.4/rutorrent-plugin-rpc_3.8-1_mipsel-3.4.ipk Installing rutorrent (3.8-1) to root... Downloading http://bin.entware.net/mipselsf-k3.4/rutorrent_3.8-1_mipsel-3.4.ipk Installing rtorrent-rpc (0.9.7-1) to root... Downloading http://bin.entware.net/mipselsf-k3.4/rtorrent-rpc_0.9.7-1_mipsel-3.4.ipk Installing libcurl (7.61.0-3) to root... Downloading http://bin.entware.net/mipselsf-k3.4/libcurl_7.61.0-3_mipsel-3.4.ipk Installing libopenssl (1.0.2p-1) to root... Downloading http://bin.entware.net/mipselsf-k3.4/libopenssl_1.0.2p-1_mipsel-3.4.ipk Installing zlib (1.2.11-2) to root... Downloading http://bin.entware.net/mipselsf-k3.4/zlib_1.2.11-2_mipsel-3.4.ipk Installing ca-bundle (20180409-3) to root... Downloading http://bin.entware.net/mipselsf-k3.4/ca-bundle_20180409-3_all.ipk Installing libtorrent (0.13.7) to root... Downloading http://bin.entware.net/mipselsf-k3.4/libtorrent_0.13.7_mipsel-3.4.ipk Installing libsigcxx (2.5.4-1) to root... Downloading http://bin.entware.net/mipselsf-k3.4/libsigcxx_2.5.4-1_mipsel-3.4.ipk Installing libncursesw (6.1-1) to root... Downloading http://bin.entware.net/mipselsf-k3.4/libncursesw_6.1-1_mipsel-3.4.ipk Installing xmlrpc-c-server (1.39.13-2) to root... Downloading http://bin.entware.net/mipselsf-k3.4/xmlrpc-c-server_1.39.13-2_mipsel-3.4.ipk Installing xmlrpc-c (1.39.13-2) to root... Downloading http://bin.entware.net/mipselsf-k3.4/xmlrpc-c_1.39.13-2_mipsel-3.4.ipk Installing xmlrpc-c-internal (1.39.13-2) to root... Downloading http://bin.entware.net/mipselsf-k3.4/xmlrpc-c-internal_1.39.13-2_mipsel-3.4.ipk Installing xmlrpc-c-common (1.39.13-2) to root... Downloading http://bin.entware.net/mipselsf-k3.4/xmlrpc-c-common_1.39.13-2_mipsel-3.4.ipk Installing coreutils-stat (8.23-3) to root... Downloading http://bin.entware.net/mipselsf-k3.4/coreutils-stat_8.23-3_mipsel-3.4.ipk Installing coreutils (8.23-3) to root... Downloading http://bin.entware.net/mipselsf-k3.4/coreutils_8.23-3_mipsel-3.4.ipk Installing coreutils-id (8.23-3) to root... Downloading http://bin.entware.net/mipselsf-k3.4/coreutils-id_8.23-3_mipsel-3.4.ipk Installing gzip (1.9-1) to root... Downloading http://bin.entware.net/mipselsf-k3.4/gzip_1.9-1_mipsel-3.4.ipk Installing curl (7.61.0-3) to root... Downloading http://bin.entware.net/mipselsf-k3.4/curl_7.61.0-3_mipsel-3.4.ipk Installing screen (4.6.2-1) to root... Downloading http://bin.entware.net/mipselsf-k3.4/screen_4.6.2-1_mipsel-3.4.ipk Installing libncurses (6.1-1) to root... Downloading http://bin.entware.net/mipselsf-k3.4/libncurses_6.1-1_mipsel-3.4.ipk Installing php7-cgi (7.2.9-1) to root... Downloading http://bin.entware.net/mipselsf-k3.4/php7-cgi_7.2.9-1_mipsel-3.4.ipk Installing php7 (7.2.9-1) to root... Downloading http://bin.entware.net/mipselsf-k3.4/php7_7.2.9-1_mipsel-3.4.ipk Installing libxml2 (2.9.8-3) to root... Downloading http://bin.entware.net/mipselsf-k3.4/libxml2_2.9.8-3_mipsel-3.4.ipk Installing lighttpd-mod-fastcgi (1.4.49-2) to root... Downloading http://bin.entware.net/mipselsf-k3.4/lighttpd-mod-fastcgi_1.4.49-2_mipsel-3.4.ipk Installing lighttpd (1.4.49-2) to root... Downloading http://bin.entware.net/mipselsf-k3.4/lighttpd_1.4.49-2_mipsel-3.4.ipk Installing lighttpd-mod-scgi (1.4.49-2) to root... Downloading http://bin.entware.net/mipselsf-k3.4/lighttpd-mod-scgi_1.4.49-2_mipsel-3.4.ipk Installing lighttpd-mod-auth (1.4.49-2) to root... Downloading http://bin.entware.net/mipselsf-k3.4/lighttpd-mod-auth_1.4.49-2_mipsel-3.4.ipk Installing lighttpd-mod-authn_file (1.4.49-2) to root... Downloading http://bin.entware.net/mipselsf-k3.4/lighttpd-mod-authn_file_1.4.49-2_mipsel-3.4.ipk Configuring zlib. Configuring libopenssl. Configuring ca-bundle. Configuring libcurl. Configuring lighttpd. Configuring lighttpd-mod-authn_file. Configuring xmlrpc-c-common. Configuring xmlrpc-c-internal. Configuring xmlrpc-c. Configuring libxml2. Configuring php7. Configuring php7-cgi. Configuring coreutils. Configuring coreutils-stat. Configuring libsigcxx. Configuring libtorrent. Configuring libncursesw. Configuring xmlrpc-c-server. Configuring rtorrent-rpc. Configuring coreutils-id. Configuring gzip. Configuring curl. Configuring rutorrent. Configuring rutorrent-plugin-rpc. Configuring libncurses. Configuring screen. Configuring lighttpd-mod-fastcgi. Configuring lighttpd-mod-scgi. Configuring lighttpd-mod-auth. Configuring rtorrent-easy-install.When you install the package, you will be immediately prompted to configure basic features.
You can set your login/password, port, upload/download speed, path for downloaded torrent files:
Type "username:password" if you want to protect Web UI or hit Enter to leave password protection disabled []: set your username:password, e.g. myhome:mytorrent
Which port should be used by web interface? [81]: default port is 81, you can set any free port.
Enter (maximal) download speed in KB/s [2048]: default speed is 2048, you can set your own value.
Enter (maximal) upload speed in KB/s [2048]: default speed is 2048, you can set your own value.
Enter folder name on USB drive where torrent content should be stored [/opt/torrents]: specify the path where torrent files will be downloaded. It is better to install NTFS partition, for example we have created a partition with NTFS file system called
FILES, in it we have createddownloaddirectory, specify the path:/tmp/mnt/FILES/download#### Welcome to rtorrent easy installation script! We assuming no lighttpd/rtorrent/rutorrent was installed before! Please, answer a few question to configure torrent client. Default aswers given in [brackets], just hit Enter to accept it. Type "username:password" if you want to protect Web UI or hit Enter to leave password protection disabled []: test:test Which port should be used by web interface? [81]: Enter (maximal) download speed in KB/s [2048]: Enter (maximal) upload speed in KB/s [2048]: Enter folder name on USB drive where torrent content should be stored [/opt/torrents]: Done! You may open 51411-51412 TCP/UDP ports on your router to facilitate uploading/donwloading. It's not necessary but recommended. rutorrent web UI will be available at following URL: http://<ip_address_of_router>:<port>/rutorrent Do you wish to start torrent client? [y]: Starting lighttpd... done. Starting rtorrent... done.
If the rtorrent daemon fails to start, you will see an error:
Do you wish to start torrent client? [y]:
 Starting lighttpd... done.
 Starting rtorrent... failed.
Collected errors:
 * pkg_run_script: package "rtorrent-easy-install" postinst script returned status 255.
 * opkg_configure: rtorrent-easy-install.postinst returned 255.
It will be necessary to make changes to the rtorrent configuration. To do this, you will need to install the nano package and edit the rtorrent.conf configuration file.
Install the nano package:
/ #
opkg install nanoInstalling nano (2.9.8-1) to root... Downloading http://bin.entware.net/mipselsf-k3.4/nano_2.9.8-1_mipsel-3.4.ipk Configuring nano.Edit the rtorrent.conf configuration file, where we delete the old configuration:
/ # nano /opt/etc/rtorrent/rtorrent.conf
Highlight all lines of the old config, press
Alt + A:max_uploads = 8 session = /opt/etc/rtorrent/session schedule = watch_directory,5,5,load_start=/opt/etc/rtorrent/watchdir/*.torrent schedule = untied_directory,5,5,stop_untied= schedule = low_diskspace,5,60,close_low_diskspace=100M bind = 0.0.0.0 port_range = 51411-51411 check_hash = yes #use_udp_trackers = yes encryption = allow_incoming,enable_retry,prefer_plaintext dht = auto dht_port = 51412 peer_exchange = yes scgi_local = /opt/var/rpc.socket encoding_list = UTF-8 max_uploads_global = 32 max_downloads_global = 64 download_rate = 2048 upload_rate = 2048 directory = /opt/torrents
Delete all lines of the old config, press
Ctrl + K.Add lines of the new config, press
Ctrl + V:throttle.max_uploads.set = 8 session.path.set = /opt/etc/rtorrent/session schedule2 = watch_directory,5,5,load_start=/opt/etc/rtorrent/watchdir/*.torrent schedule2 = untied_directory,5,5,stop_untied= schedule2 = low_diskspace,5,60,close_low_diskspace=100M network.bind_address.set = 0.0.0.0 network.port_range.set = 51411-51411 pieces.hash.on_completion.set = yes trackers.use_udp.set = yes protocol.encryption.set = allow_incoming,enable_retry,prefer_plaintext dht.mode.set = auto dht.port.set = 51412 protocol.pex.set = yes network.scgi.open_local = /opt/var/rpc.socket encoding.add = UTF-8 throttle.max_uploads.global.set = 32 throttle.max_downloads.global.set = 64 throttle.global_down.max_rate.set_kb = 0 throttle.global_up.max_rate.set_kb = 0 directory.default.set = /opt/torrents
Press
Ctrl + O, save the configuration.Exit the nano editor
Ctrl + X.Start the rtorrent:
/ #
/opt/etc/init.d/S85rtorrent startStarting rtorrent... done.Go to the rTorrent web interface at
http://192.168.1.1:81/rutorrent/, configure and check how it works: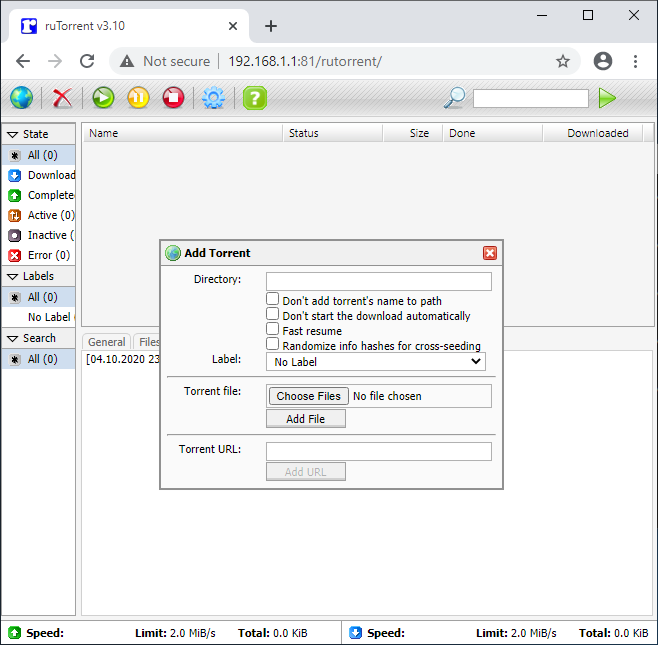

Important
The support of the package is provided in the developers' forum topic — .