Internet safety with SkyDNS
SkyDNS content filtering service. Allows you to block access to certain sites on the Internet, and protects network users' devices from virus and phishing sites.
The service has a separate tariff called SkyDNS.Home. It is also called Parental Control. The solution helps to protect children from dangerous and 'adult' sites, set the time available for surfing the Internet, and keep abreast of children's online interests.
SkyDNS parental control features
Content filtering for over 60 website categories
User-defined allow and deny lists
Online activity statistics
Filtering schedule
Built-in safe search system
Blocking of new or unknown sites that have not yet been categorized by the service
Customized filtering profiles
Prevent access to online proxies and anonymizers designed to bypass blockers
Customizable blocking pages
Account management via a website or desktop agent (Windows)
Online technical support
Getting started with SkyDNS
To work with the content filter, you need to create an account. To do this, you need to register for free at this link. You will get a 5-day trial period with full functionality of the 'Home' tariff. Click the 'Go to new account' button to enter your personal user account and start setting up.

Blocking entire categories and individual subcategories of websites
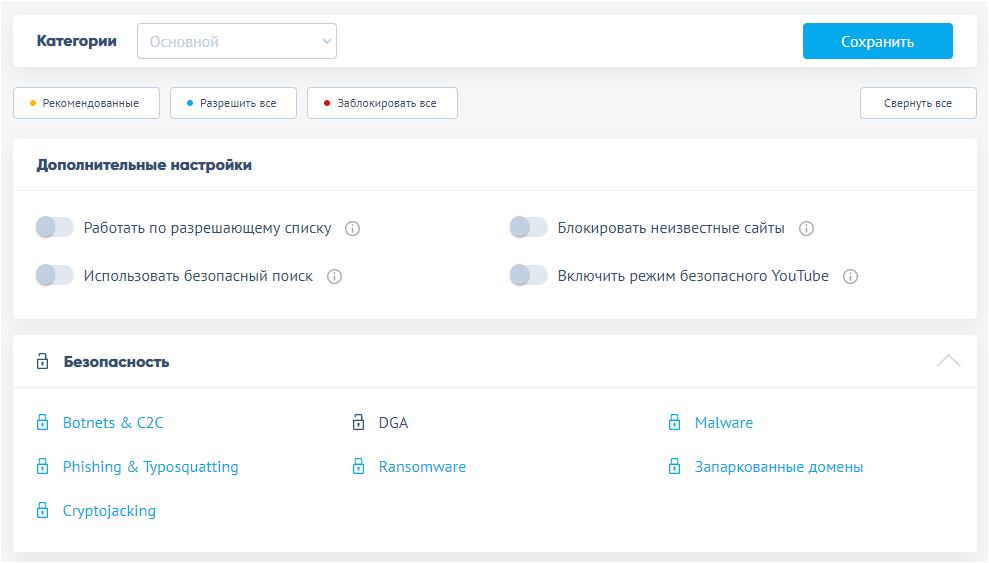
After registration, log in under your account to 'My Account' on the service's website. On the 'Categories' tab you can block or open access to 60+ categories and subcategories of sites. For example, you can block the entire 'Traffic Eaters' category, but keep the 'File Archives' subcategory available.
Also on the 'Categories' tab you can activate additional settings: work only on the whitelist, use safe search, block unknown sites, and enable safe YouTube mode.
In addition, you can use the automatic blocking list 'Recommended' from the top menu, and allow or block everything.
Working with Allow and Deny Lists
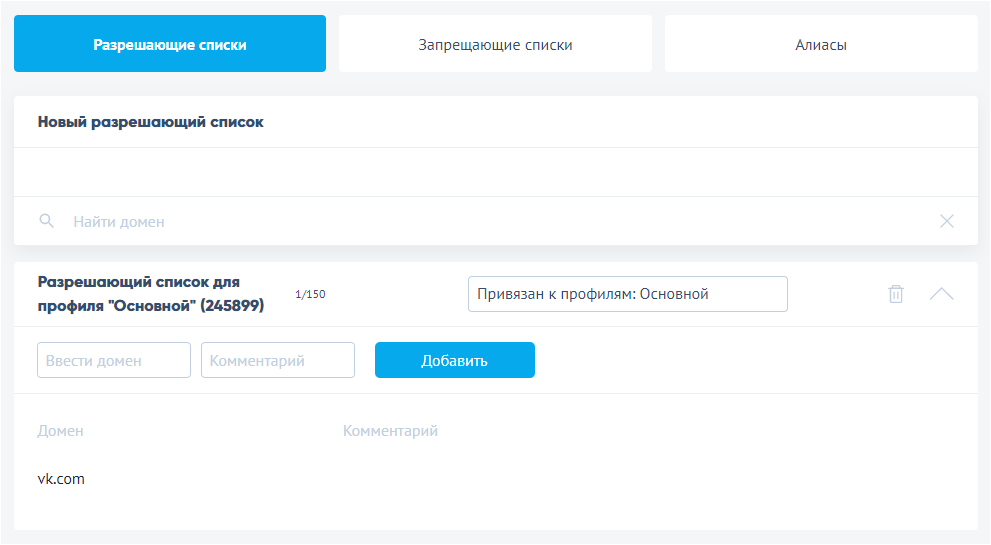
The service allows you to create your own ‘black’ and ‘white’ lists of sites. The first helps to block specific Internet resources, the second helps to open only specified sites.
Online activity statistics
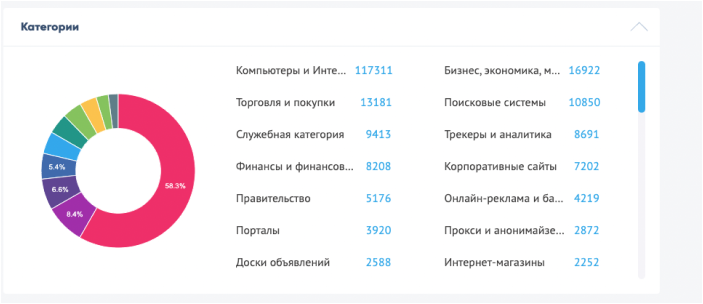
SkyDNS on the 'Home' tariff collects statistics of visited and blocked web resources for the last 6 months (on other tariffs this period may be 12 months). Statistical information on the service is updated every hour.
You can read more about collecting statistics in our article ‘Viewing statistics of visited and blocked sites with SkyDNS service’.
Different filter profiles
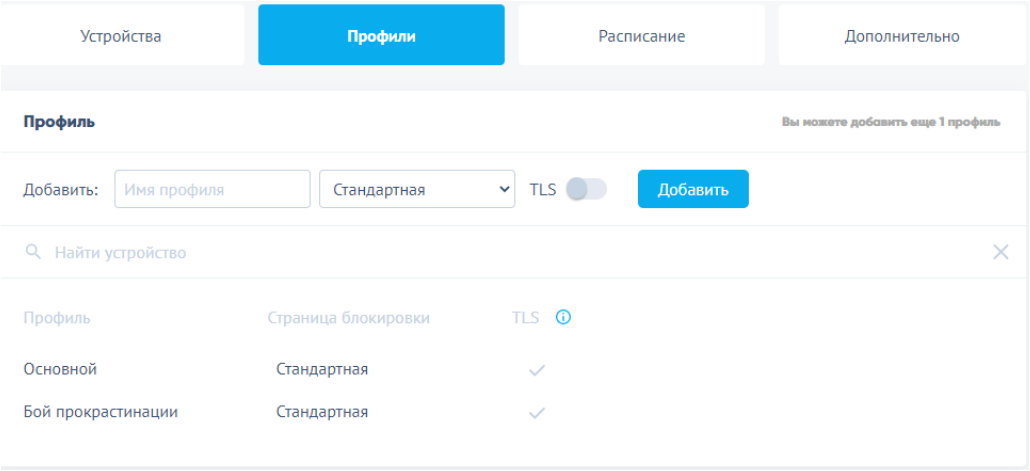
Content Filter allows you to create different filtering profiles for entire groups and individual users. For example, you can set different access rules for children of different ages and for children and parents.
Filtering schedule
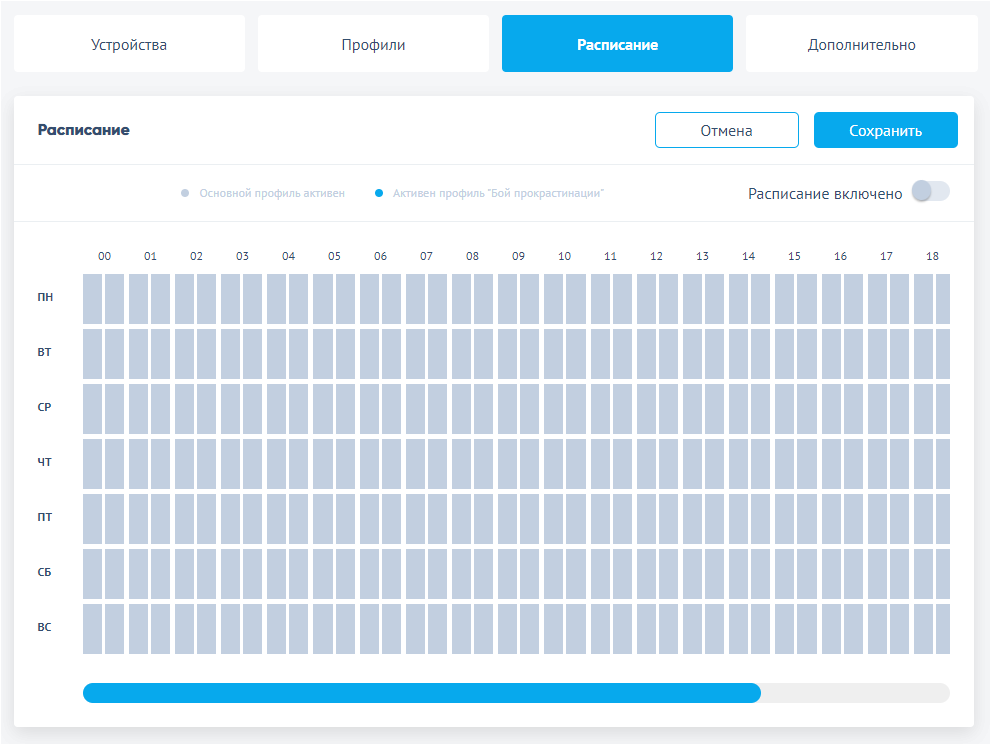
SkyDNS helps you schedule access to websites down to days and hours. For example, in the afternoon, children can access only educational resources to complete their homework.
Also, the schedule function together with the whitelist-only option allows you to completely block the Internet at a given time, if necessary.
Configuring SkyDNS on Keenetic
To start working with SkyDNS service on your Keenetic router, you need to install the 'SkyDNS' system component. You can do this on the "General System Settings' page in the 'KeeneticOS Updates and Components' section by clicking 'Component options'.

Before setting up the Internet filter, register your devices according to the instructions 'Connected devices registration'.
From the Internet Safety menu in the Network rules section of your Keenetic's Web Interface, open the Content filter tab. Select the SkyDNS option for Filter mode. A SkyDNS account section will appear.
Notice
You cannot select other subscription-based services, such as NextDNS, or preset public services, such as CloudFlare, on your Keenetic after selecting SkyDNS filtering mode. You can still set up any DNS service on devices on the network using local DNS resolution profiles or on-device configuration (requires Transit requests to be enabled in the device's DNS resolution profile).
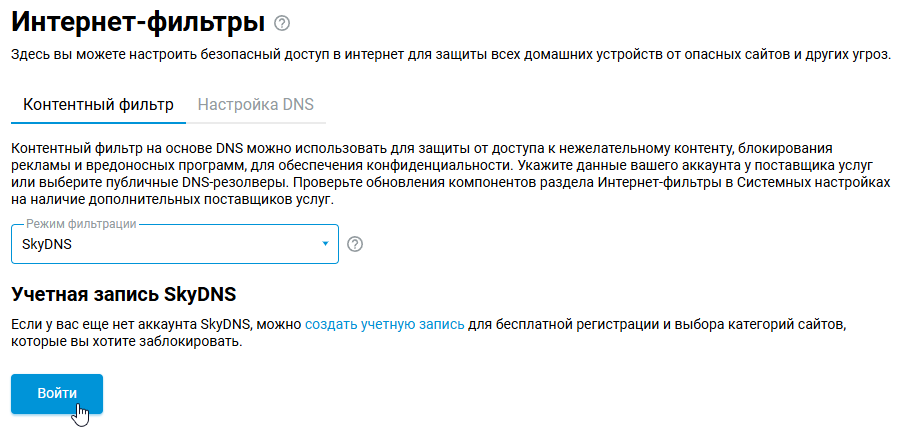
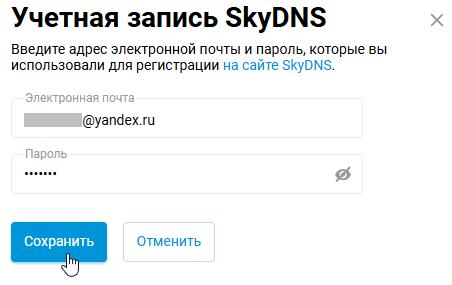
Click the Log in button. Enter your SkyDNS account login email and password in the pop-up window and click Save.
Keenetic will attempt to register with the SkyDNS service. You will see your SkyDNS subscription plan in the Pricing schedule field.
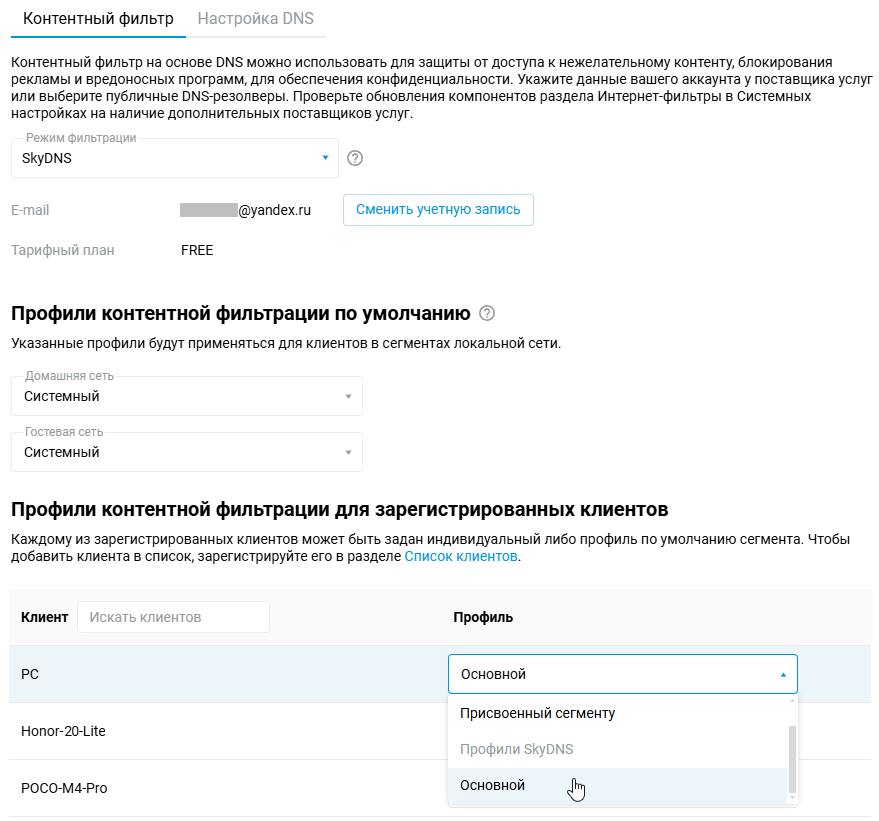
By default, Keenetic sets all network devices to resolve Internet resource addresses using the system DNS profile. Typically, the System profile only uses your ISP's DNS resolver and does not provide any protection or content filtering.
The Default content filtering profiles associations will work for any unregistered device on each local network. Registered devices set to the Segment default profile will also use these associations.
After successfully registering with the content filtering service, you can assign SkyDNS profiles to devices individually or based on the network segment of their connection. To start with, a SkyDNS service account offers the pre-installed Default filtering profile. This profile is fully customizable. It comes pre-set with safety content filters and protection from illegal and adult material.
In our example, the profile is set to 'Basic' for the computer. In reality, the administrator can create other filtering profiles and set different levels of access to websites for each device on the home network.
For information on additional ways of blocking sites, see the 'How to block access to a specific site?' article.
Answers to common questions about the service can be found at https://www.skydns.ru/guides/faq/