Network packet capture
Network packet capture is a network diagnostic tool that allows you to capture and store packets passing through the router's network interfaces.
You can enable network traffic capture through the selected router's interface. As a result, a special file will be created that can be opened for viewing and analysis on your computer in Wireshark or submitted to the support team for analysis.
The network packet dump will help you diagnose network traffic problems and analyze what happens to specific packets. Based on this information, it will be possible to conclude the correctness or incorrectness of the routing, host or provider's gateway to determine the causes of the problem and options for fixing them.
Important
When contacting our email help@keenetic.ru, in addition to the network traffic dump file (*.pcapng) resulting from the packet capture, be sure to provide the system file self-test.txt. Save it as soon as the packet capture is complete.
Information of a *.pcapng file alone without self-test.txt will be useless, as it is impossible to determine the conditions under which the packet capture was performed.
For your Keenetic to have a network packet capture setting in its web interface, you need to install the 'Packet capture' OS component. You can do this on the 'General System Settings' page in the 'Updates and component options' section by clicking on 'Component options'.

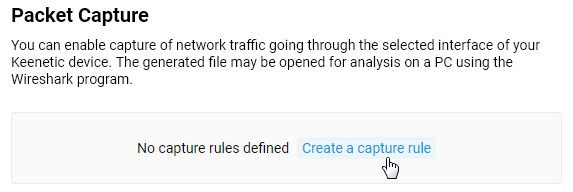
To capture network packets, go to the 'Diagnostics' page. In the 'Packet Capture' section, click 'Create a capture rule'.
'Packet Capture Settings' window will open, where you must specify the 'Connection' (the interface from which you want to capture packets). In most cases, this is an active interface for connecting to the Internet — 'Provider' (ISP). If you use PPTP, L2TP, PPPoE or 3G/4G modem when connecting to the Internet, in these cases, specify the appropriate interface.
In some cases, traffic on the 'Home segment' interface may also be of interest.
Important
It is impossible to capture packets between Wi-Fi-connected clients, as they are handled at the hardware level of the Wi-Fi chipset for maximum performance.
Specify the 'Storage location' of the packet capture file. If your Keenetic has a USB port for external drives, we recommend using it to save the file. Otherwise, the packet capture file will be stored in the internal memory of the device.
In the 'Traffic type to capture' field, you can select a value, depending on which traffic you want to capture — Incoming, Outgoing, or Incoming and outgoing (default).
If necessary, you can apply a filter in the 'Capture filter' field to reduce the amount of captured traffic and save memory space for the data you are interested in. The filter syntax is the same as in Wireshark. For example, with the filter 'host 192.168.1.33 and port 53', only DNS traffic from the host 192.168.1.33 will be captured. If nothing is specified in the 'Capture filter' field, all network packets will be captured, but in this case, the packet dump file will be larger in size.
Examples of using filters:
ip host x.x.x.x.x— a filter that captures packets only with the addressx.x.x.x.xtcp dst port 80— a filter that only captures HTTP packets (destination portTCP 80)ip proto icmp— a filter that captures only ICMP requests (ping)udp port 53— a filter that captures the exchange of queries and responses with the DNS serverudp port 68— a filter that captures the exchange of queries and responses with the DHCP server
Leave the remaining fields set to their default values.
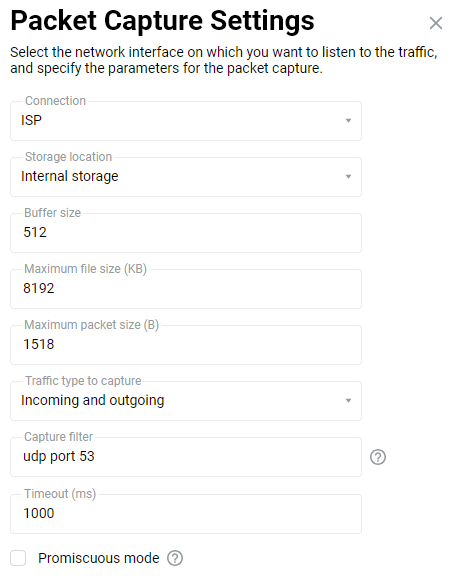
For more information on all the settings, see the article 'Advanced Network Capture Configuration'.
You can now proceed to start capturing packets.
Important
Capture the packets in such a way that you can see the traffic information when a problem occurs. It is recommended that you start capturing dumps (packet captures) before the problem occurs.
Click the 'Start' button to start the created rule.
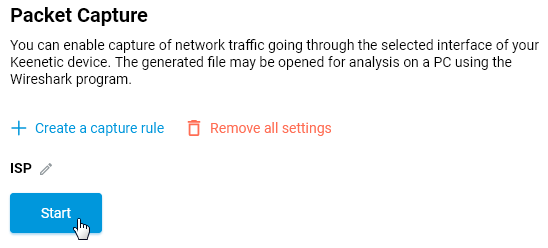
The router will start collecting network packets.
After the problem has been reproduced, you must stop capturing packets by clicking the 'Stop' button.
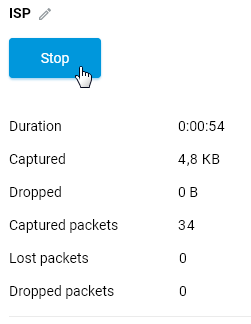
If a USB drive is specified in the 'Storage location' field, the network packet capture file will be saved to it. If the location is set to 'Internal Memory', click 'Save to computer'.
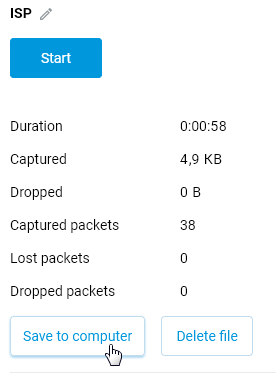
You will be prompted to save the file in the *.pcapng format, which contains the captured network packets.
Use the Wireshark network traffic analyzer tool to view the packet dump file on your computer.
Tip
If you plan to contact our support service via email help@keenetic.ru with a description of the problem that is observed, then in addition to the received file with the dump of network packets (
*.pcapng), be sure to attach a self-test.txt diagnostic file, which will help our engineers to solve the problem faster.When debugging problems with multicast (IPTV/VoIP), it is recommended to disable the 'Network Accelerator Engine' or remove the system component before starting to collect packets.