How to check the network adapter settings in Windows
In Windows 7, click Start > Control Panel > Network and Sharing Center > Change adapter settings.
In Windows 10, click Start > Settings > Control Panel > Network and Internet > Network and Sharing Center > Change adapter settings.
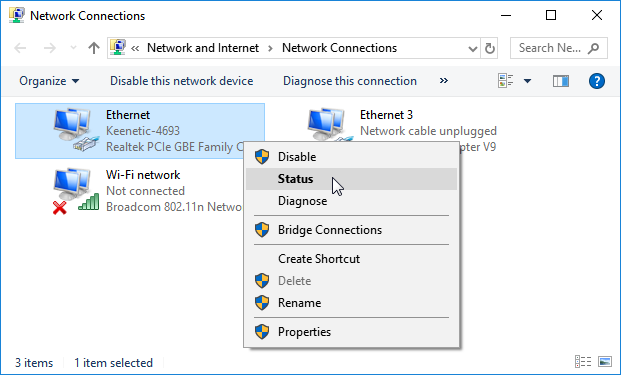
In the list of network connections that opens, select the connection you are using to connect to your ISP (Wi-Fi or Ethernet). Right-click on the connection and click 'Status' in the drop-down list.

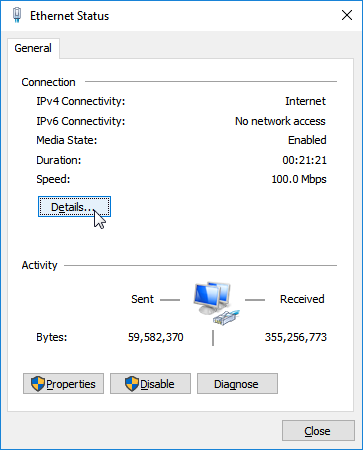
In the window that opens, click the 'Details...' button.

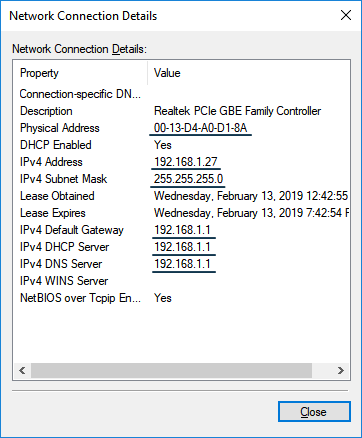
The following information is displayed in the newly opened 'Network connection information' window:
The 'Physical Address' row contains the network card's MAC address;
the 'IPv4 Address' and 'IPv4 Subnet Mask' rows contain the IP address and the network mask, respectively (can be assigned automatically via DHCP or manually).
The 'Lease Obtained' and 'Lease Expires' rows indicate the lease period of the IP address received from the DHCP server. When the lease period for the IP address expires, the IP address will be updated.
The 'IPv4 Default Gateway' line specifies the IP addresses of the gateway.
When you obtain an IP address via DHCP (an IP address is assigned automatically), the DHCP server's IP address is displayed in the 'IPv4 DHCP server' field.
The 'IPv4 DNS server' line shows the preferred and alternate domain name servers' IP addresses.

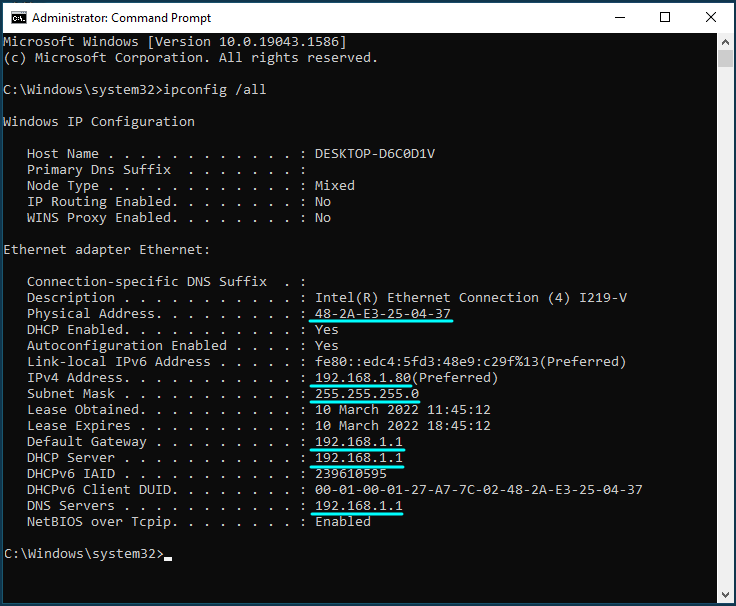
You can also view the network card settings using the ipconfig command from the Windows command line.
Run the Command Line application cmd, and in the window that opens type: ipconfig /all

In some cases, multiple real or virtual network adapters may be installed on your computer. The command will display the network settings for all adapters then.
For information on configuring the network adapter in Windows to automatically obtain an IP address, see ???.