Changing the operating mode and role of network ports
A Keenetic router provides flexible settings for network ports of the built-in Ethernet switch.
For example, you can change the operating mode of a particular port (manually set the speed, duplex, or disable it), change the purpose of the port (e.g., use one of the LAN ports as a WAN port, or vice versa, use the WAN port as a LAN port).
Сhanging the port's operating mode (speed and duplex parameters)
This option may be required for compatibility with network devices.
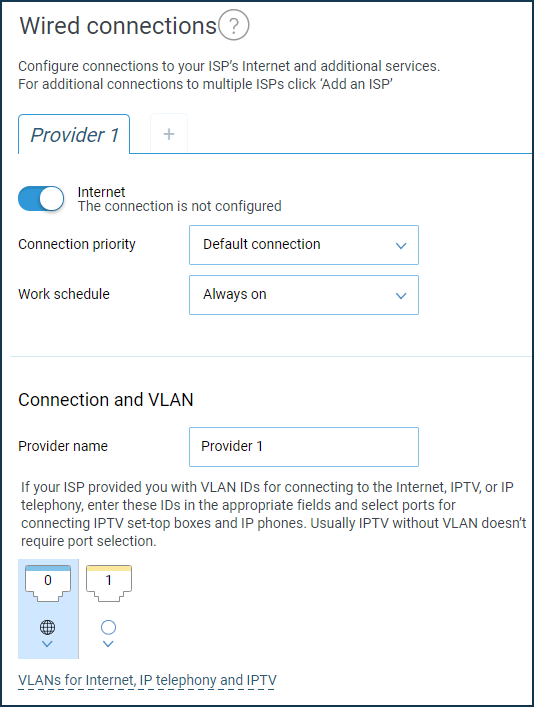
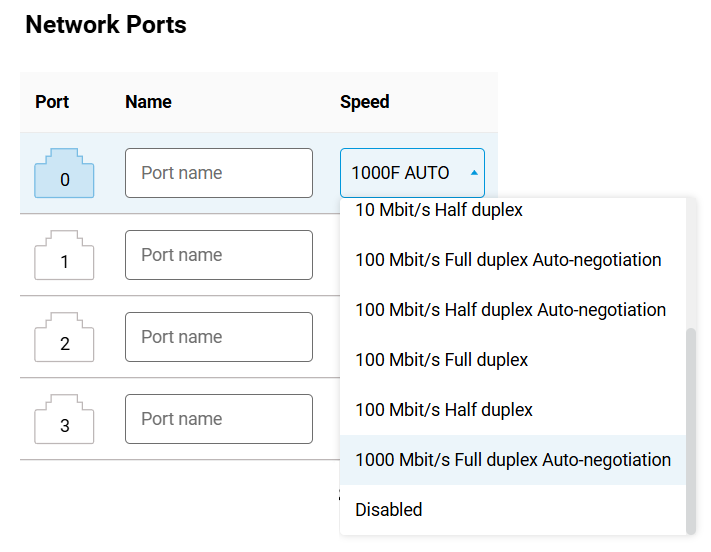
On the General System Settings page in the Network Ports section, you can manually set the operating mode for each network port. The Keenetic router's built-in Ethernet switch automatically detects connection speed and cable type (duplex mode) by default. If necessary, the speed/duplex settings on the Ethernet port can be set manually.
Setting one of the LAN ports as a WAN port
You can assign a WAN port function to one of the free LAN ports.
Important
Be sure to disconnect the ISP Internet cable from the router before changing the port role.
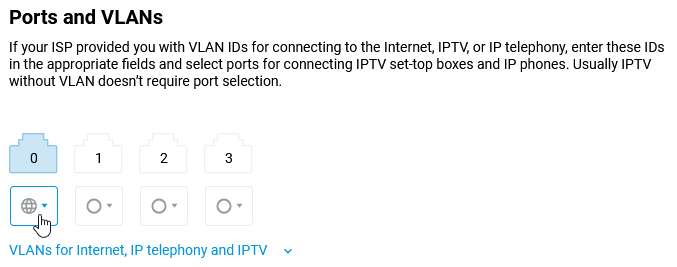
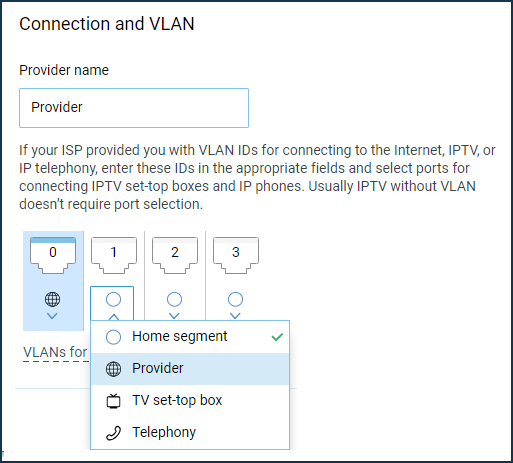
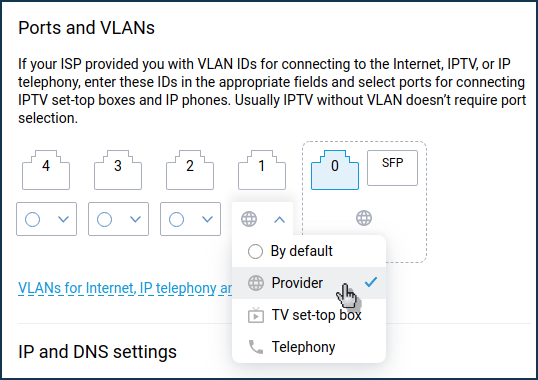
Go to the Ethernet Cable Connections to Internet page, in the Ports and VLANs section, select a free LAN port (in our example, it is port 1) and choose Provider, which will determine the operation of this port as a WAN port of the Provider wired Internet connection.
Save the setting and connect the ISP's network cable to this port.
Then make sure that Keenetic has received an IP address from your ISP (established a connection). On the System Dashboard home page in the Internet section, the IP address will be displayed in the same way as when the ISP cable is normally connected to the default WAN port.
Note
Keenetic routers support multiple simultaneous connections (usually called Multi-WAN). For example, you can simultaneously connect two Internet Ethernet cables from different ISPs to the Keenetic and set up basic connection redundancy. All Keenetic routers, without exception, support Multi-WAN. For information on configuring it, see the article Using multiple ISPs: redundancy and multi-WAN.
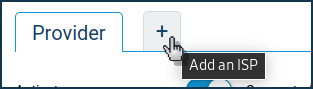
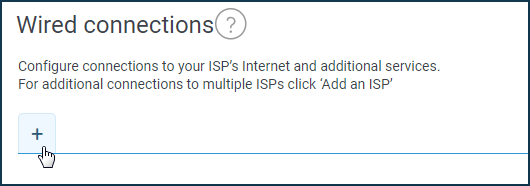
For models with an SFP slot, the setup will be slightly different. On the Ethernet Cable Connections to Internet page, click on + (Add an ISP).
Then under Ports and VLANs, select a free LAN port (port 1 in our example) and set it to Provider, which will define this port to act as a WAN port.
Using the WAN port as a LAN port
For example, such a task may be required for routers that use a 3G/4G USB modem as their primary and only Internet connection. The WAN port 0 of the router is not used, but it can be configured to connect home network devices, i.e. it can be used as a regular LAN port and thus increase the number of home network ports.
Warning
Before performing the steps below, we recommend backing up the current router configuration by saving the startup-config.txt file. This will allow you to quickly restore the device configuration to its previous state if necessary.
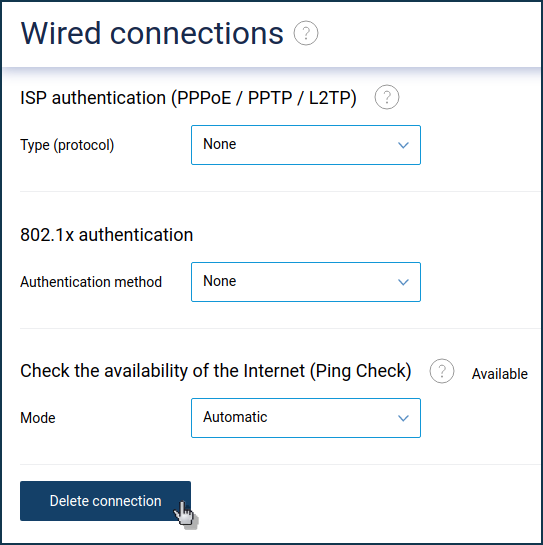
Since this example does not use the main WAN port 0 of the built-in switch (using an Internet connection via a USB modem), the wired connection to the ISP must be deleted. Go to the Ethernet Cable Connections to Internet page and click Delete connection (located at the bottom on the right).
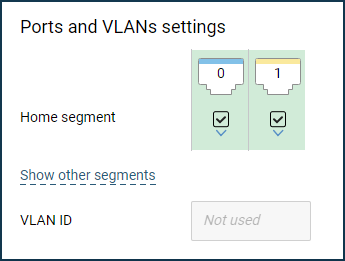
After that, the WAN port 0 will be automatically included in the Home segment, i.e. it will become a regular LAN port. You will be able to use it to connect home devices via Ethernet cable.
To check, connect the network device to the WAN port 0. It should automatically obtain the IP address of the home network from the router.
Note
Some models have a slightly different way of doing this: Setting up the WAN port as a LAN port in Gigabit models.
To restore the assignment of the 0 network WAN port (wired Internet connection) destination setting, add a wired Internet connection, or use a previously saved backup of the startup-config.txt file to restore the settings.
Go to the Ethernet Cable Connections to Internet page. Click on + (Add an ISP).
After that, the assignment of the WAN port 0 will be restored.